Lesson 06: Create an ARM Assembly Language Program (Keil MDK-ARM)
You will learn how to create an ARM assembly language program with the basics of the Keil MDK-ARM development system.
Procedures
Create an Assembly Project
Start up Keil μVision 5
- Start up Keil µVision5 by clicking on the icon
 from the desktop or form "Start" menu or "All Programs" on your computer. The following screen is what you will see.
Create a Project
Next, you will use Keil μVision to create an assembly project and execute this program on your target Tiva board.
Before you create an new project, you are recommended that you create a folder to hold all your projects and files. For example: you can have a folder "EE3450_Lab" ready before hand.
Let's create your first ARM μVision project now.
- Click on the "Project" menu form the μVision main window and select "New µVision Project"
- Select the project folder that you prepared for, give project a name "MyFirstASM", then click on "save" button

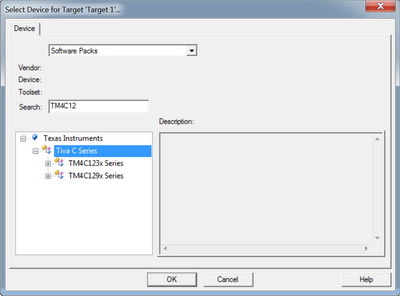
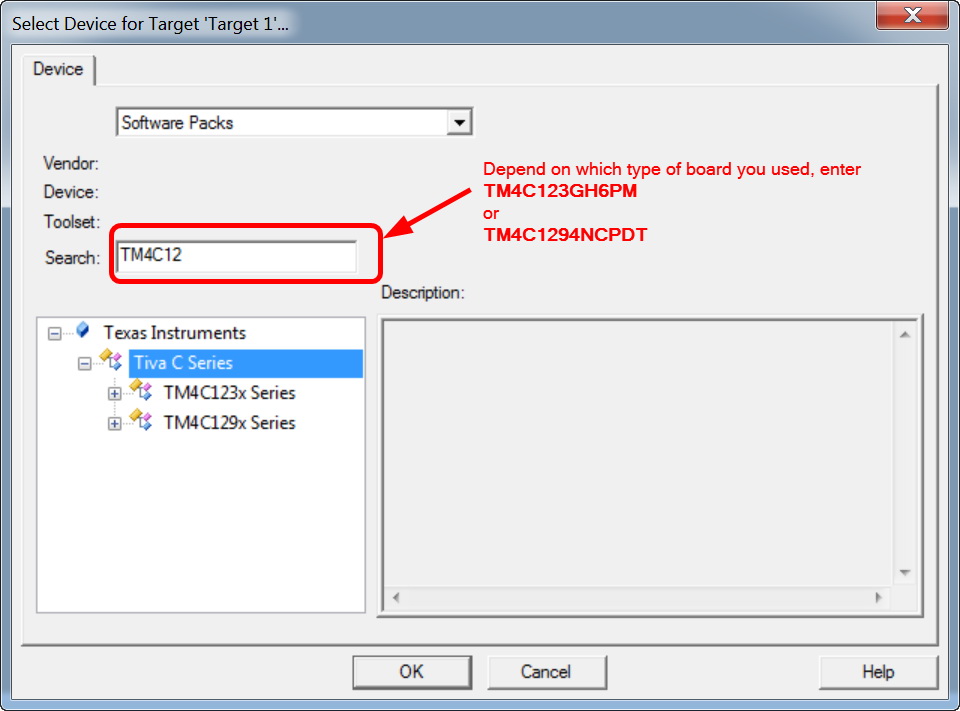
- From the "Select Device for Target 'Target1'... " dialog, you now have to select which processor family and which version you are going to use
- EK-TM4C1231GXL board: from the list of devices select Texas Instruments➤Tiva C Series➤TM4C123x Series and then from the new list select TM4C123GH6PM. Click on OK
- EK-TM4C1294XL board: from the list of devices select Texas Instruments➤Tiva C Series➤TM4C129x Series, and then from the new list select TM4C1294NCPDT. Click on OK
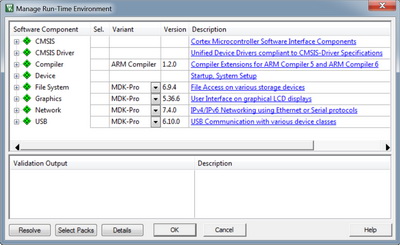
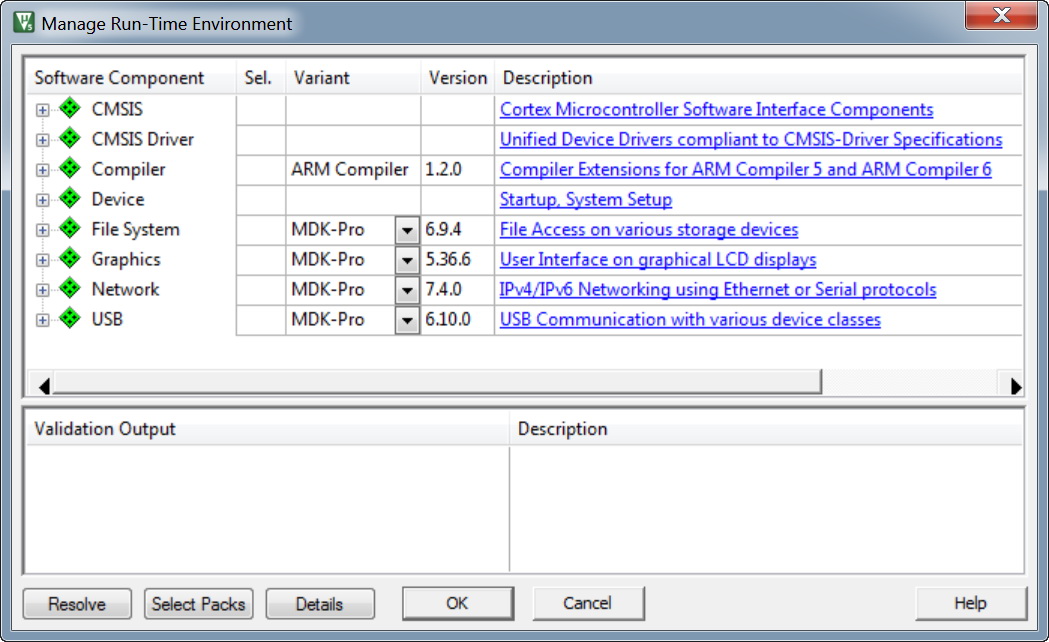
- Do not select any software component from Manage Run-Time Environment dialog. Just click on OK and you will return to the main µVision 5 windows

Create and Add Source File to the Project
Next, you will create an assembly source file to your first project.
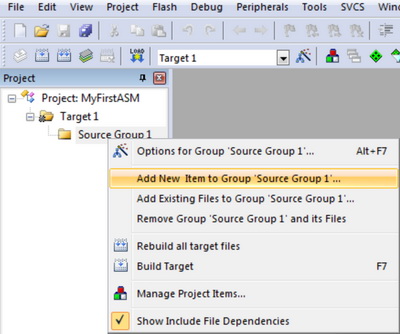
- Expand the Target 1 on the Project Windows, right click on "Source Group 1" and then select "Add New Item to Group 'Source Group 1'..."
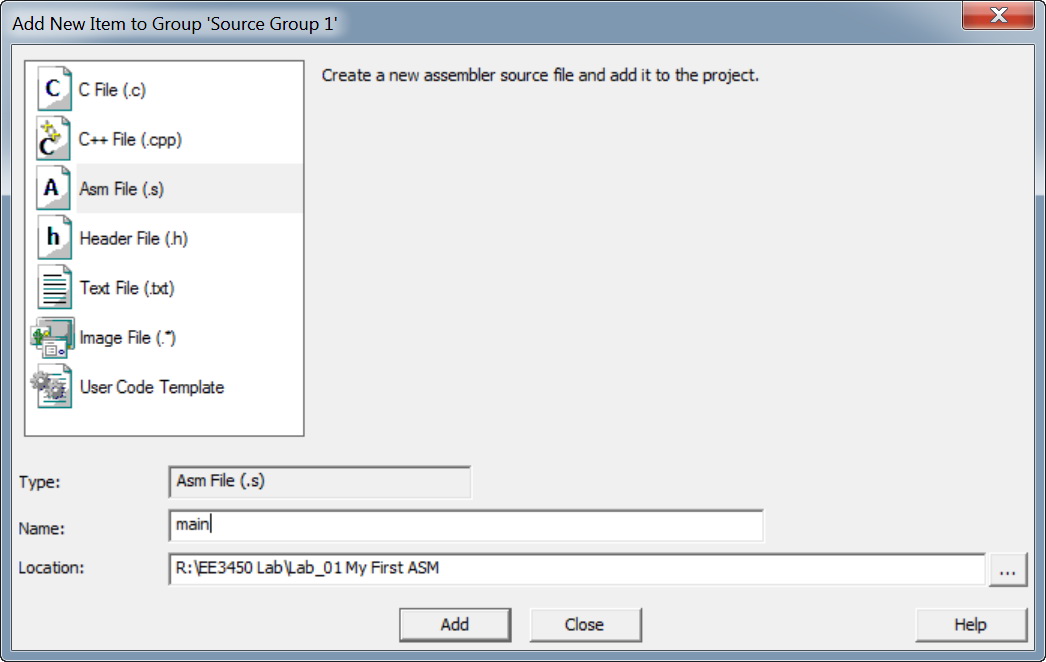
- In the pop-up dialog, select file type to Asm File (.s), enter Name "main". Click on "Add" button
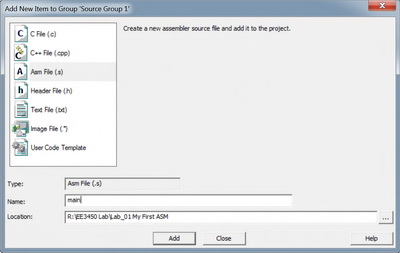
- Now, you've created an assembly project for Tiva board, and you will see the "main.s" edit window on the main screen. This is the place you will write your ARM assembly language program. Next, you will copy and paste the Assembly Sample Firmware code into this window.

ARM Assembly Template
ARM Assembly Sample Firmware code
A reset signal will be generated when power is applied to the board, or be triggered by pushing the reset button available on the board. After reset, ARM processor is in the foreground mode (thread mode), running at a privileged level, and using MSP stack pointer. The processor loads the 32-bit value at memory address \(0000.0000 into the stack pointer R13(MSP), loads the 32-bit value at \)0000.0004 into the program counter R15 (PC), and initializes the link register R14 (LR) to value \(FFFF.FFFF. The value at address \)0000.0004 is called the reset vector, and usually stored in flash ROM area.
The following assembly code are created for TI Tiva C Series ARM board. Please copy and paste the code into your main.s assembly source file.
EK-TM4C123GXL LaunchPad
The memory map of TM4C123 as follows:
- 256KB Flash ROM: 0x0000.0000 ~ 0x0003.FFFF
- 32KB RAM: 0x2000.0000 ~ 0x2000.7FFF
;This is the first ARM Assembly language program you see in the lab
;This program template was created by Airs Lin @ 2017 California State University of Los Angeles.
;When you write your program, you could have your info at the top document block
;For Example:  Your Name, Student Number, what the program is for, and what it does etc.

; Constant Variable Here
STACK_ADDR_123G EQU     0x20008000

            THUMB

; Vector Table Mapped to Address 0 at Reset
; Linker requires __Vectors to be exported

            AREA    RESET, DATA, READONLY
            EXPORT  __Vectors
__Vectors
            DCD     STACK_ADDR_123G         ; stack pointer value when stack is empty
            DCD     Reset_Handler           ; reset vector

            ALIGN

; The program
; Linker requires Reset_Handler

            AREA    |.text|, CODE, READONLY
            ENTRY                           ; mark first instruction to execute
            EXPORT Reset_Handler
Reset_Handler
;;;;;;;;;; Your Main Code Starts from the next line ;;;;;;;;;;;;

            MOV     R0, #12


            ADD     R0, R0, #4
DeadLoop    B       DeadLoop

; The constant variable area
; The value will be stored on ROM segment
            AREA    ConstantVariables, DATA, READONLY

; The variables area
; The variables will be assigned to RAM area
            AREA    Variables, DATA, READWRITE

            END     ; End of the program
EK-TM4C1294XL LaunchPad

The memory map of TM4C1294 as follows:
- 1024KB Flash ROM: 0x0000.0000 ~ 0x000F.FFFF
- 256KB RAM: 0x2000.0000 ~ 0x2003.FFFF
;This is the first ARM Assembly language program you see in the lab
;This program template was created by Airs Lin @ 2017 California State University of Los Angeles.
;When you write your program, you could have your info at the top document block
;For Example:  Your Name, Student Number, what the program is for, and what it does etc.

; Constant Variable Here
STACK_ADDR_1294 EQU     0x20040000

            THUMB

; Vector Table Mapped to Address 0 at Reset
; Linker requires __Vectors to be exported

            AREA    RESET, DATA, READONLY
            EXPORT  __Vectors
__Vectors
            DCD     STACK_ADDR_1294         ; stack pointer value when stack is empty
            DCD     Reset_Handler           ; reset vector

            ALIGN

; The program
; Linker requires Reset_Handler

            AREA    |.text|, CODE, READONLY
            ENTRY                           ; mark first instruction to execute
            EXPORT Reset_Handler
Reset_Handler
;;;;;;;;;; Your Main Code Starts from the next line ;;;;;;;;;;;;

            MOV     R0, #12


            ADD     R0, R0, #4
DeadLoop    B       DeadLoop

; The constant variable area
; The value will be stored on ROM segment
            AREA    ConstantVariables, DATA, READONLY

; The variables area
; The variables will be assigned to RAM area
            AREA    Variables, NOINIT, READWRITE

            END     ; End of the program
Four areas are created in the Sample Firmware code.
- RESET Vectors Area (Line 14 ~ 18):
This is very important step to build the reset vectors. It is created at flash ROM location $0000.0000. There are two 32-bit values in this area, first is the initialization value for stack pointer R13(MSP); second 32-bit value is pointed to the reset handler (main program) - Main Code Area (Line 25 ~ 35)
The main program starts at this area. - Constant Variables Area (Line 39)
The constant variables can be defined in this area. This area is created at flash ROM location, so the value can not be modified. All the variables in this area must have an initial value. - Variables Area (Line 43)
This area can be used for variables, and it is created at RAM location from $2000.0000. Any variable in the RAM area needs initial value, the value must be assigned in the main code.
Debug Interface
To debug the code, Keil MDK-ARM build-ins a very useful software simulator, and also fully supports JTAG adapters for in-circuit debugging.
- Software simulator providers complete instruction set simulation for all ARM7, ARM8, Cortex-M based microcontrollers. When debugging your program, op-codes are interpreted and executed as their corresponding instructions would be. This allows program execution without hardware within a fully controlled environment. The μVision simulator traps and reports any illegal memory access. It helps programmers to find out the serious problem that can grow and eventually crash embedded system (your program) without the hardware connection.
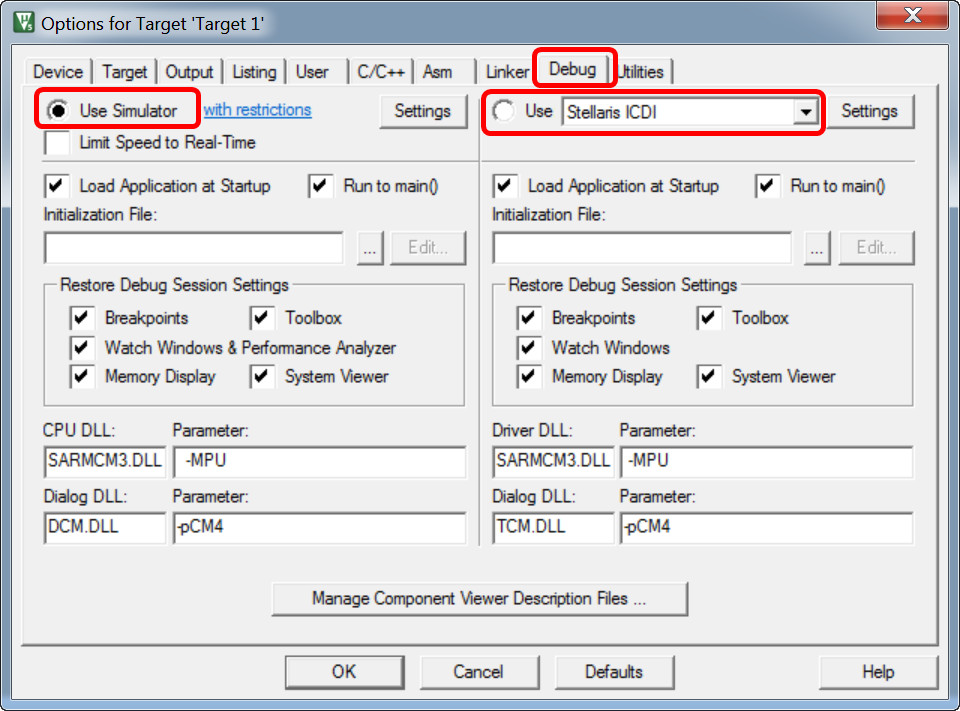
To set up simulator, follows the steps:
- Right click on "Target 1" and select "Options for Target 'Target 1'..." or click on button
 to open options dialog.
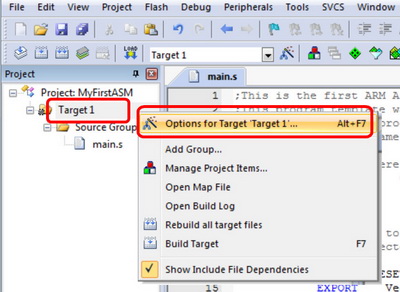
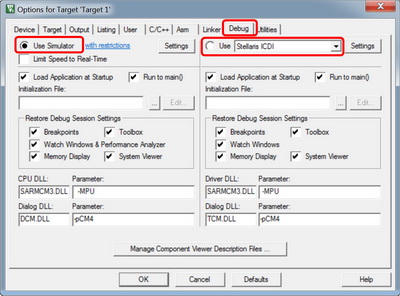
- Click on the "Debug" tab.
- For software simulation: Click on "Use Simulator".
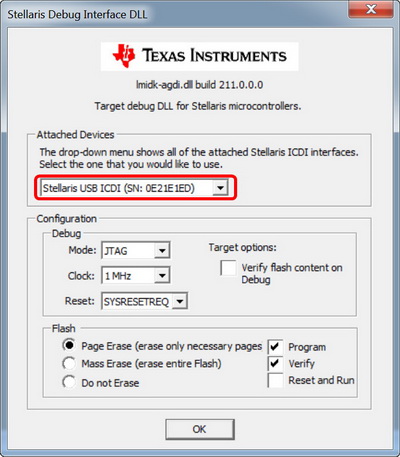
- For in-circuit hardware debugger, click on "Use:" and select debugger interface to "Stellaris ICDI"
- If you select "Use Stellaris ICDI" to debug your code, you must connect the Tiva board win the PC. After you connect the Tiva board, you can click on button "Settings" and make sure that "Stellaris USB ICDI(SN: XXXXXXXX)" is showed in "Attached Devices" field. If it is blank, it means that the Tiva in-circuit-debug-interface drivers are not installed on the PC. Please download the driver from TI, and then update the driver through the "Device Manager". The detail information about the driver can be found in "Lesson 0 - Installing Software and Drivers".
Software Simulation Pros and Cons (from Keil Web site)
Advantages:
- Early Access: Dynamic testing is available at every stage of software development
- No Hardware Required: Proof of concept testing before hardware design is done.
- Inject Dangerous Faults: Simulate conditions critical to hardware without risk.
- Full Visibility: Simulation traces data, registers and instructions and gives a full insight into the system to analyze failures.
Limitations:
- Peripheral Access: Software access to peripheral registers cannot be tested in most cases or will behave differently.
- Memory Timing: Any simulation can only assume ideal conditions for memory access. It does not simulate wait states for data or code fetches.
Build Your Project
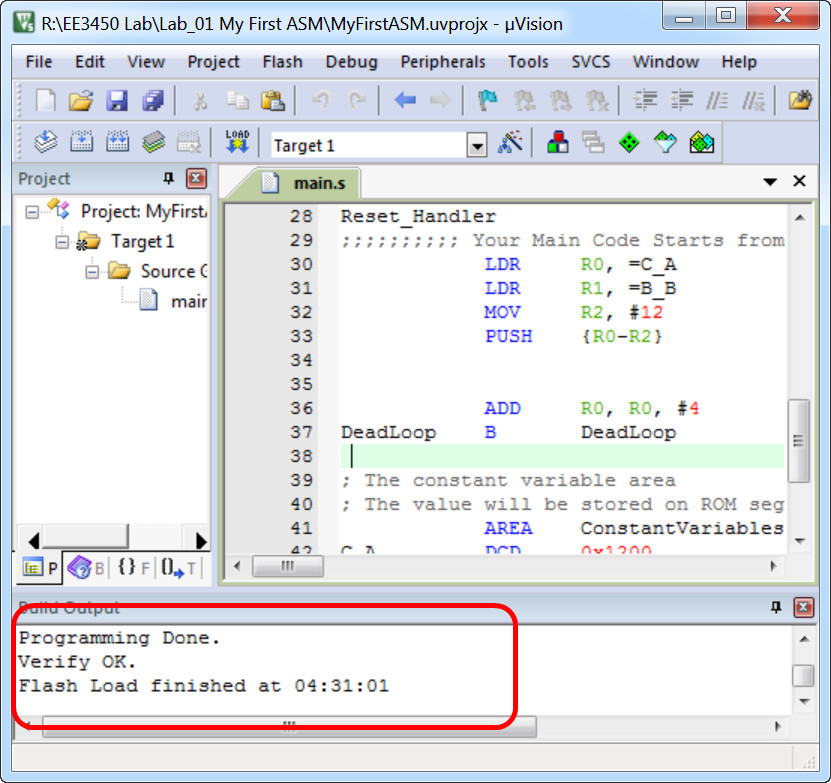
Click on the "Build" button or from the "Project" menu to select "Build Target", you will see the following screen.
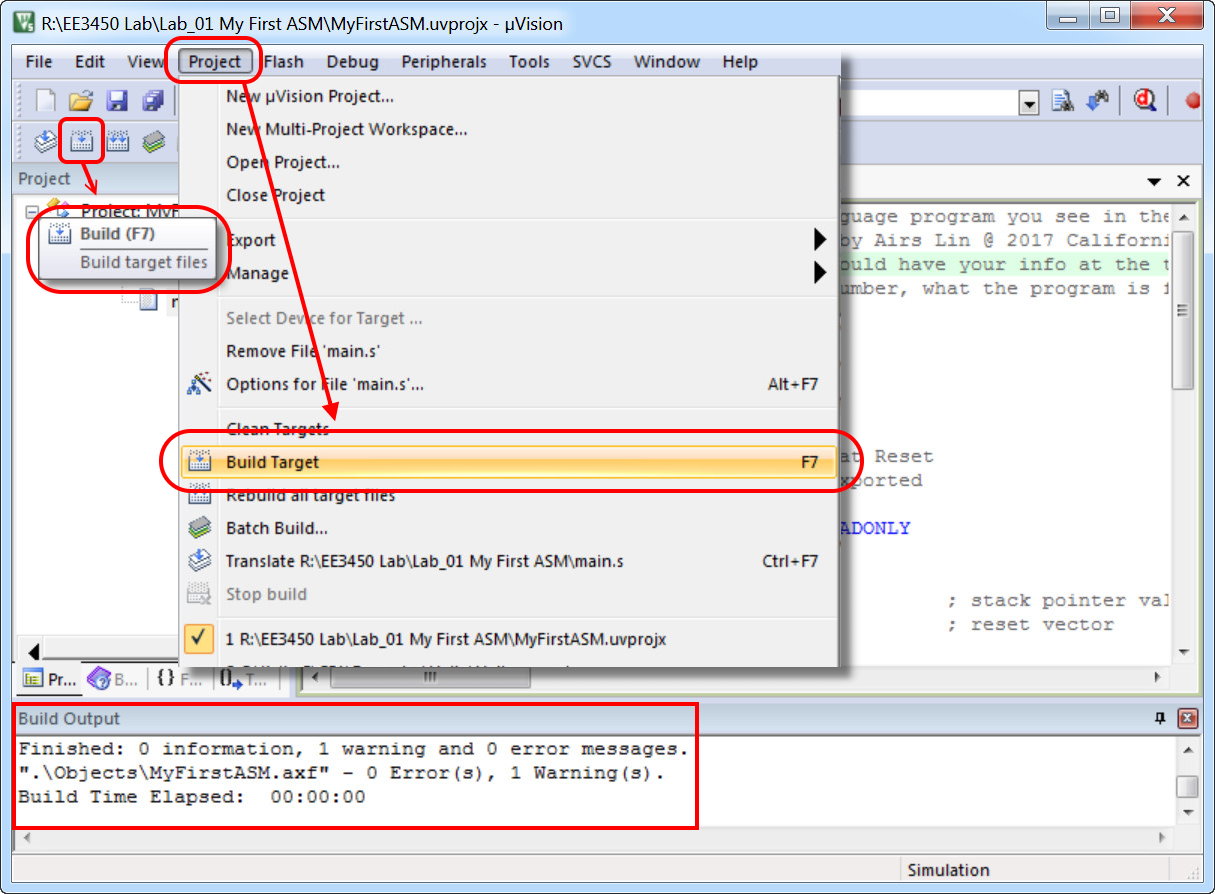
The "Build Output" window displays errors, warnings, and build messages during the build process. Check the "Build Output" window for errors, if any error occurs, the compiler will not create the target machine code file. Scroll up the in that window to see the list of errors, fix all of the (syntax) errors in your code, and then rebuild the target again.
Debug the Program
Debug the Program
If there are no any error in "Build Output" window after built the project, then you can debug your program by using software simulator, or in-circuit debugger through the JTAG adapter.
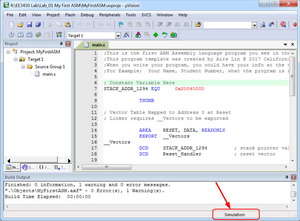
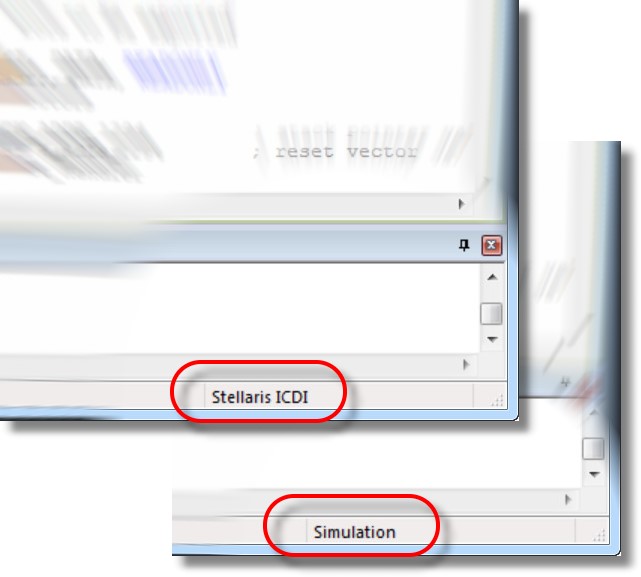
- Check the debug interface
The debug interface is displayed in the bottom right corner of μVision main screen.
- Simulation: You are using software simulator, so you do not need any hardware board.
- Stellaris ICDI: You are using in-circuit debugger, you need to connect the Tiva board with your PC and make sure all drivers are already installed.
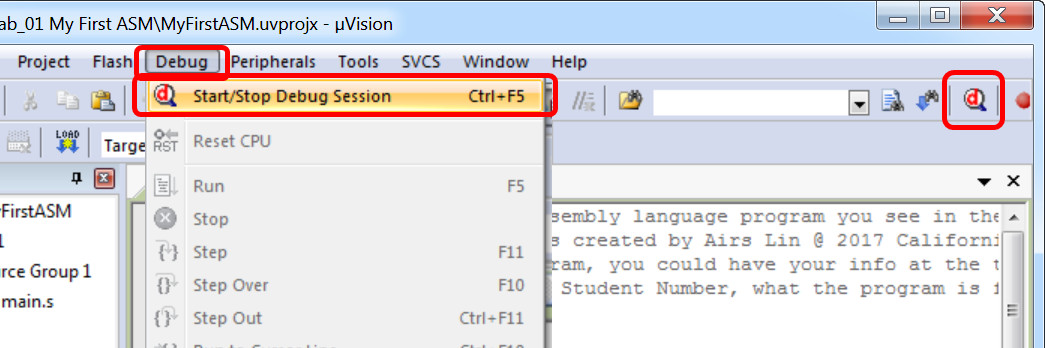
- Start debugging
You can debug the program by selecting "Start/Stop Debug Session" from the "Debug" menu or clicking on the Debug button .
.
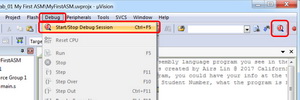
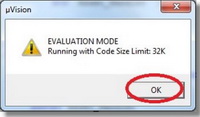
- If you do not have installed license keys for the Keil, a dialog will pop-up showing "EVALUATION MODE, Running with Code Size Limit: 32K". Just click on "OK" button.
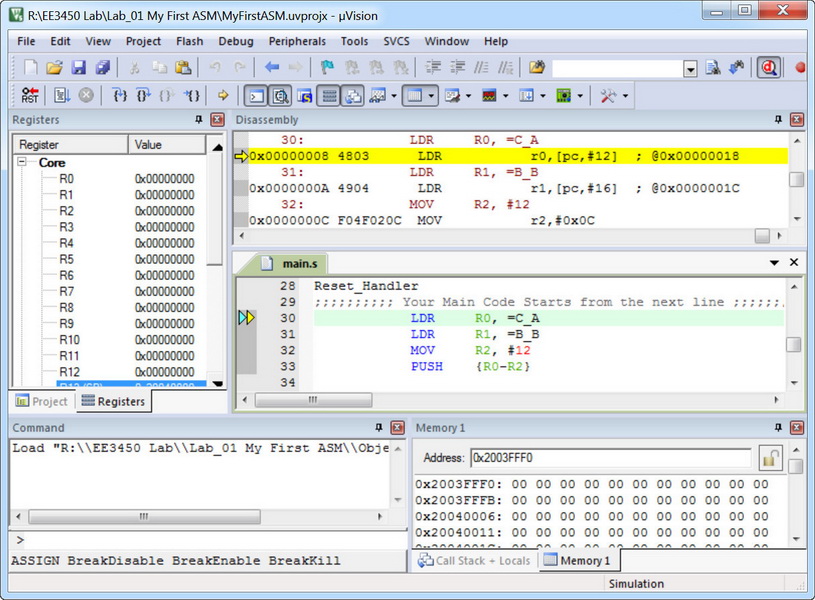
- Click on the "Maximize" button in the upper right corner of the μVision window to set the μVision to full-screen mode, so you can have a better and complete view. There are some useful windows open to help you debugging the program.
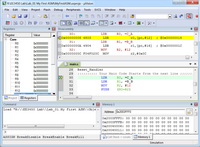
- The "Registers" window shows you the registers, you can observe the change of the values in the registers when you step-by-step to run your program.
- The "Disassembly" window shows the program execution in assembly code, or, intermixed with the source code. When the Disassembly windows is the active window, then all debug-stepping commands work on assembly level.
- The "Memory" window displays the memory area element. Several memory windows can be used at a time. Enter an address or an expression that evaluates to a memory address into "Address" field. Double-click a value to change the content. The front color indicates the memory use:
Black - CODE memory area or uninitialized RAM;
Red - CONST data in Flash ROM that has been accessed at least once;
Gold - memory location that has been initialized, but not accessed yet.;
Green - memory location has been accessed at least once.
- You can click on the "Debug" menu, or click on the buttons in the debug toolbar, or pressing shortcut-keys to debug your program.
Debug Menu and Commands
Debug Menu Toolbar Shortcut Description Start/Stop Debug Session Ctrl+F5 Starts or stops a debugging session. Reset CPU 
Sets the CPU to RESET state. Run 
F5 Continues executing the program until the next active breakpoint is reached. Stop 
Stops the program execution immediately. Step 
F11 Executes a single-step into a function; Executes the current instruction line. Step Over 
F10 Executes a single-step over a function. Step Out 
Ctrl+F11 Finishes executing the current function and stops afterwards. Run to Cursor Line 
Ctrl+F10 Executes the program until the current cursor line is reached. Show Next Statement 
Shows the next executable statement/instruction. Breakpoints Ctrl+B Opens the dialog Breakpoints. Insert/Remove Breakpoint 
F9 Toggles the breakpoint on the current line. Enable/Disable Breakpoint 
Ctrl+F9 Enables/disables the breakpoint on the current line. Disable All Breakpoints 
Disables all breakpoints in the program. Kill All Breakpoints 
Ctrl+Shift+F9 Removes all breakpoints in the program.
- If you do not have installed license keys for the Keil, a dialog will pop-up showing "EVALUATION MODE, Running with Code Size Limit: 32K". Just click on "OK" button.
- Stop Debugging
Click on the "Start/Stop Debug Session" from the "Debug" menu or click on the debug button to stop executing the program and to exit from debug mode.
Download Code
Download Code to Flash Memory on the Embedded Device
Follows steps to download the machine code to flash memory that are on your Tiva board.
- You have to use in-circuit debugger. To check the settings, you can click on "Target 1" menu and select "Options for Target 'Target 1'..." or click on buttonto open "options" dialog. Then click on the "Debug" tab. Make sure that the "Use: Stellaris ICDI" is selected.
- Connect the Tiva board to your PC.
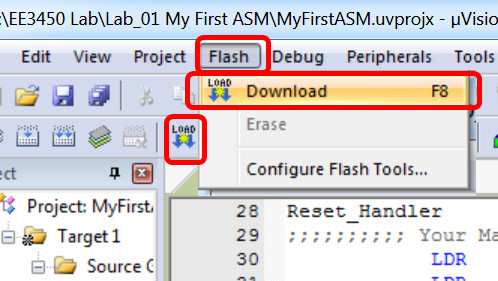
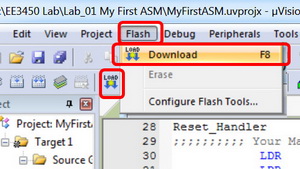
- Click on the "Download" from "Flash" menu or click on button
 .
.
- Check any error message in the "Build output" window. If Keil shows "Flash Load finished..." message, then you can press "RESET" button on the Tiva board to start you program on the hardware.